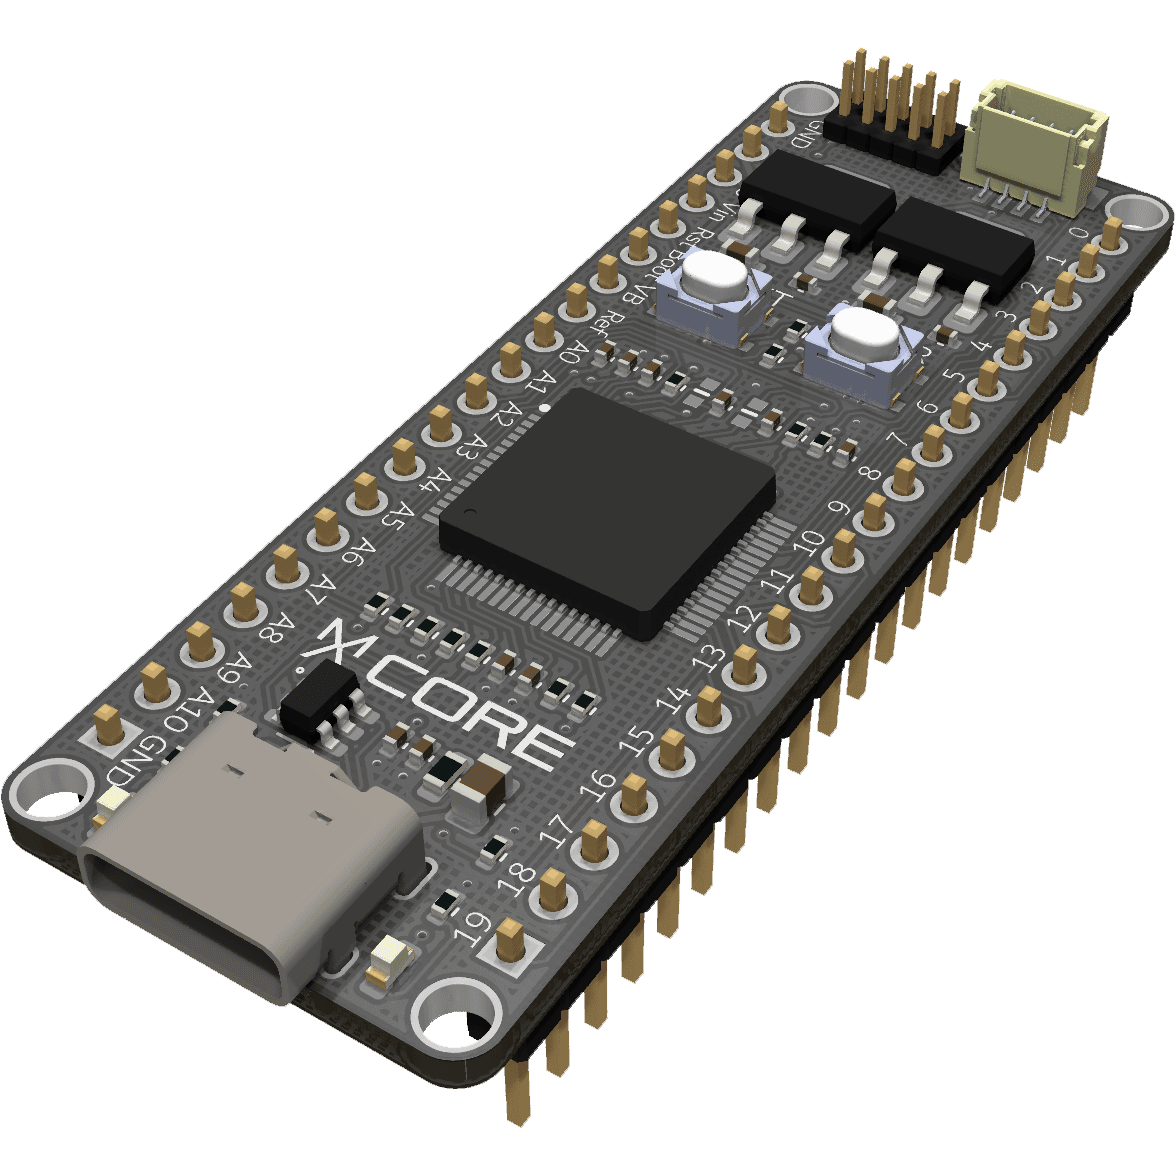
Axiometa Core 1
User Guide
This tutorial will guide you through all steps of setting up and using Axiometa Core 1
Setting Up
Code Example
Pinout Map
Schematics, 3D Models
Setting Up
Setting up the enviroment
PREREQUISITE!
- If you have not set up the Arduino IDE yet, check this tutorial for help.
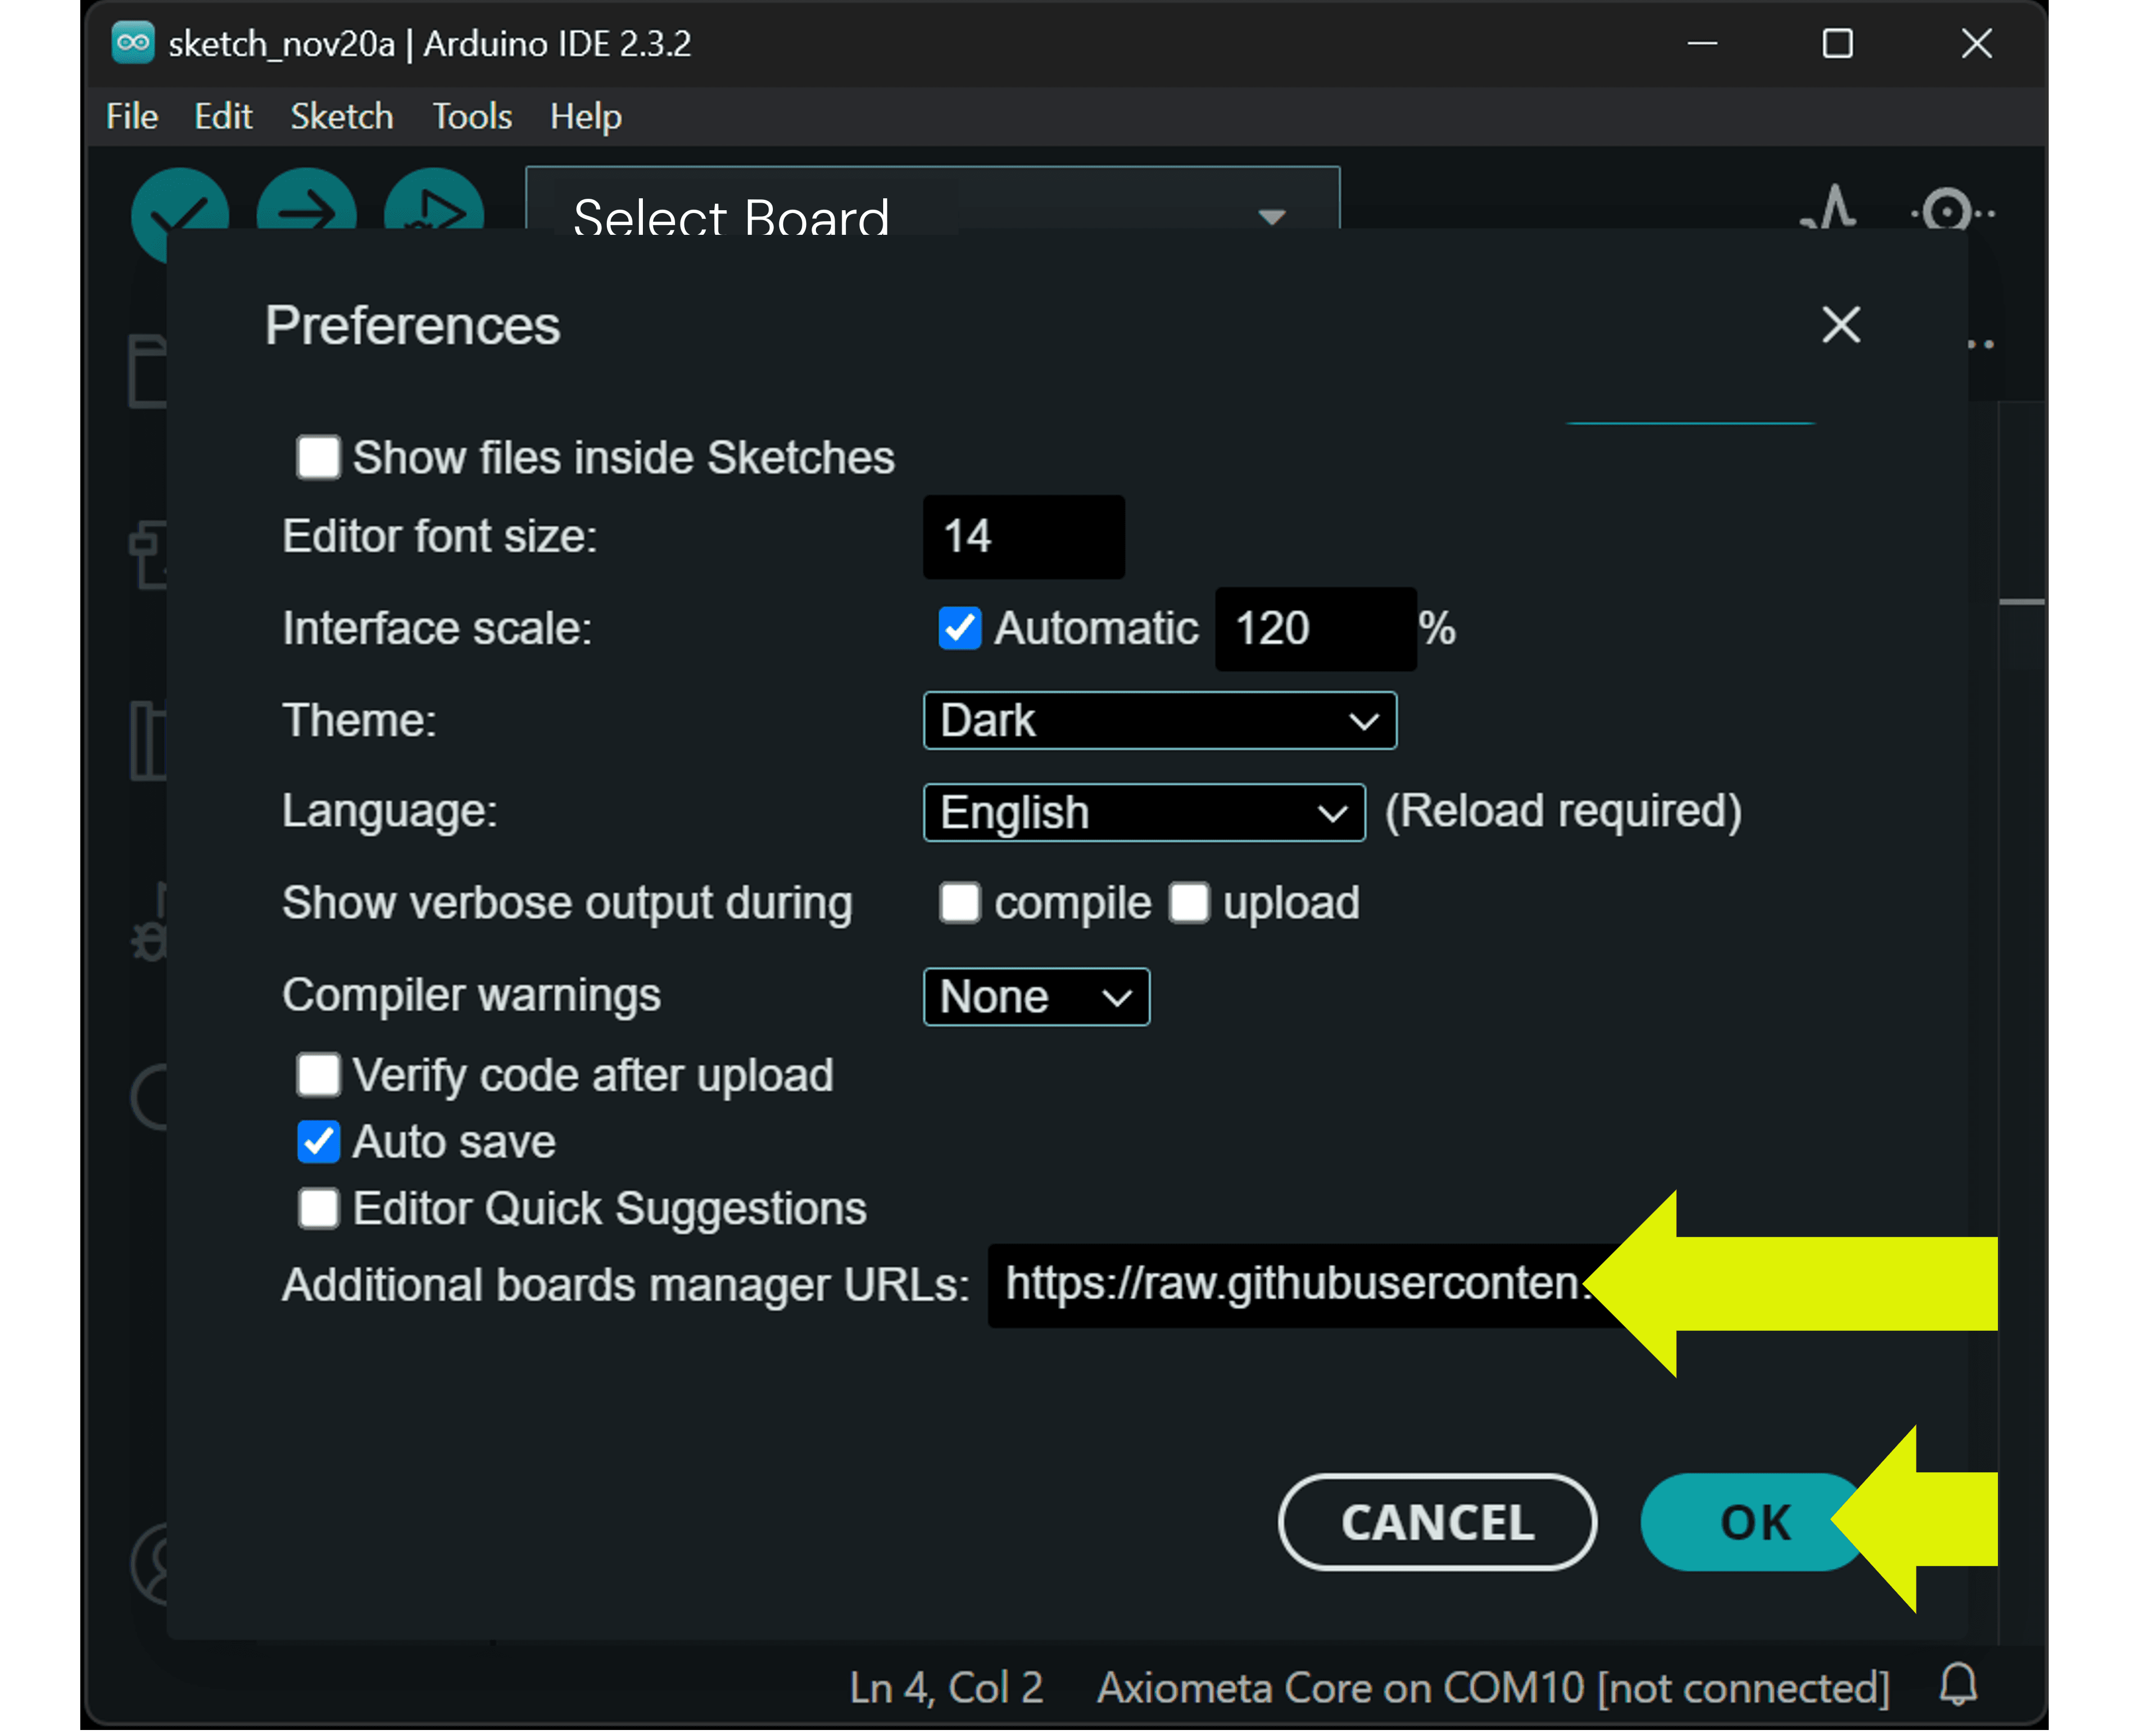
- Link for Step 5: https://raw.githubusercontent.com/axiometa/axiometa_boards_firmware/refs/heads/main/package_axiometa_index.json

1
Unbox the Core 1
2
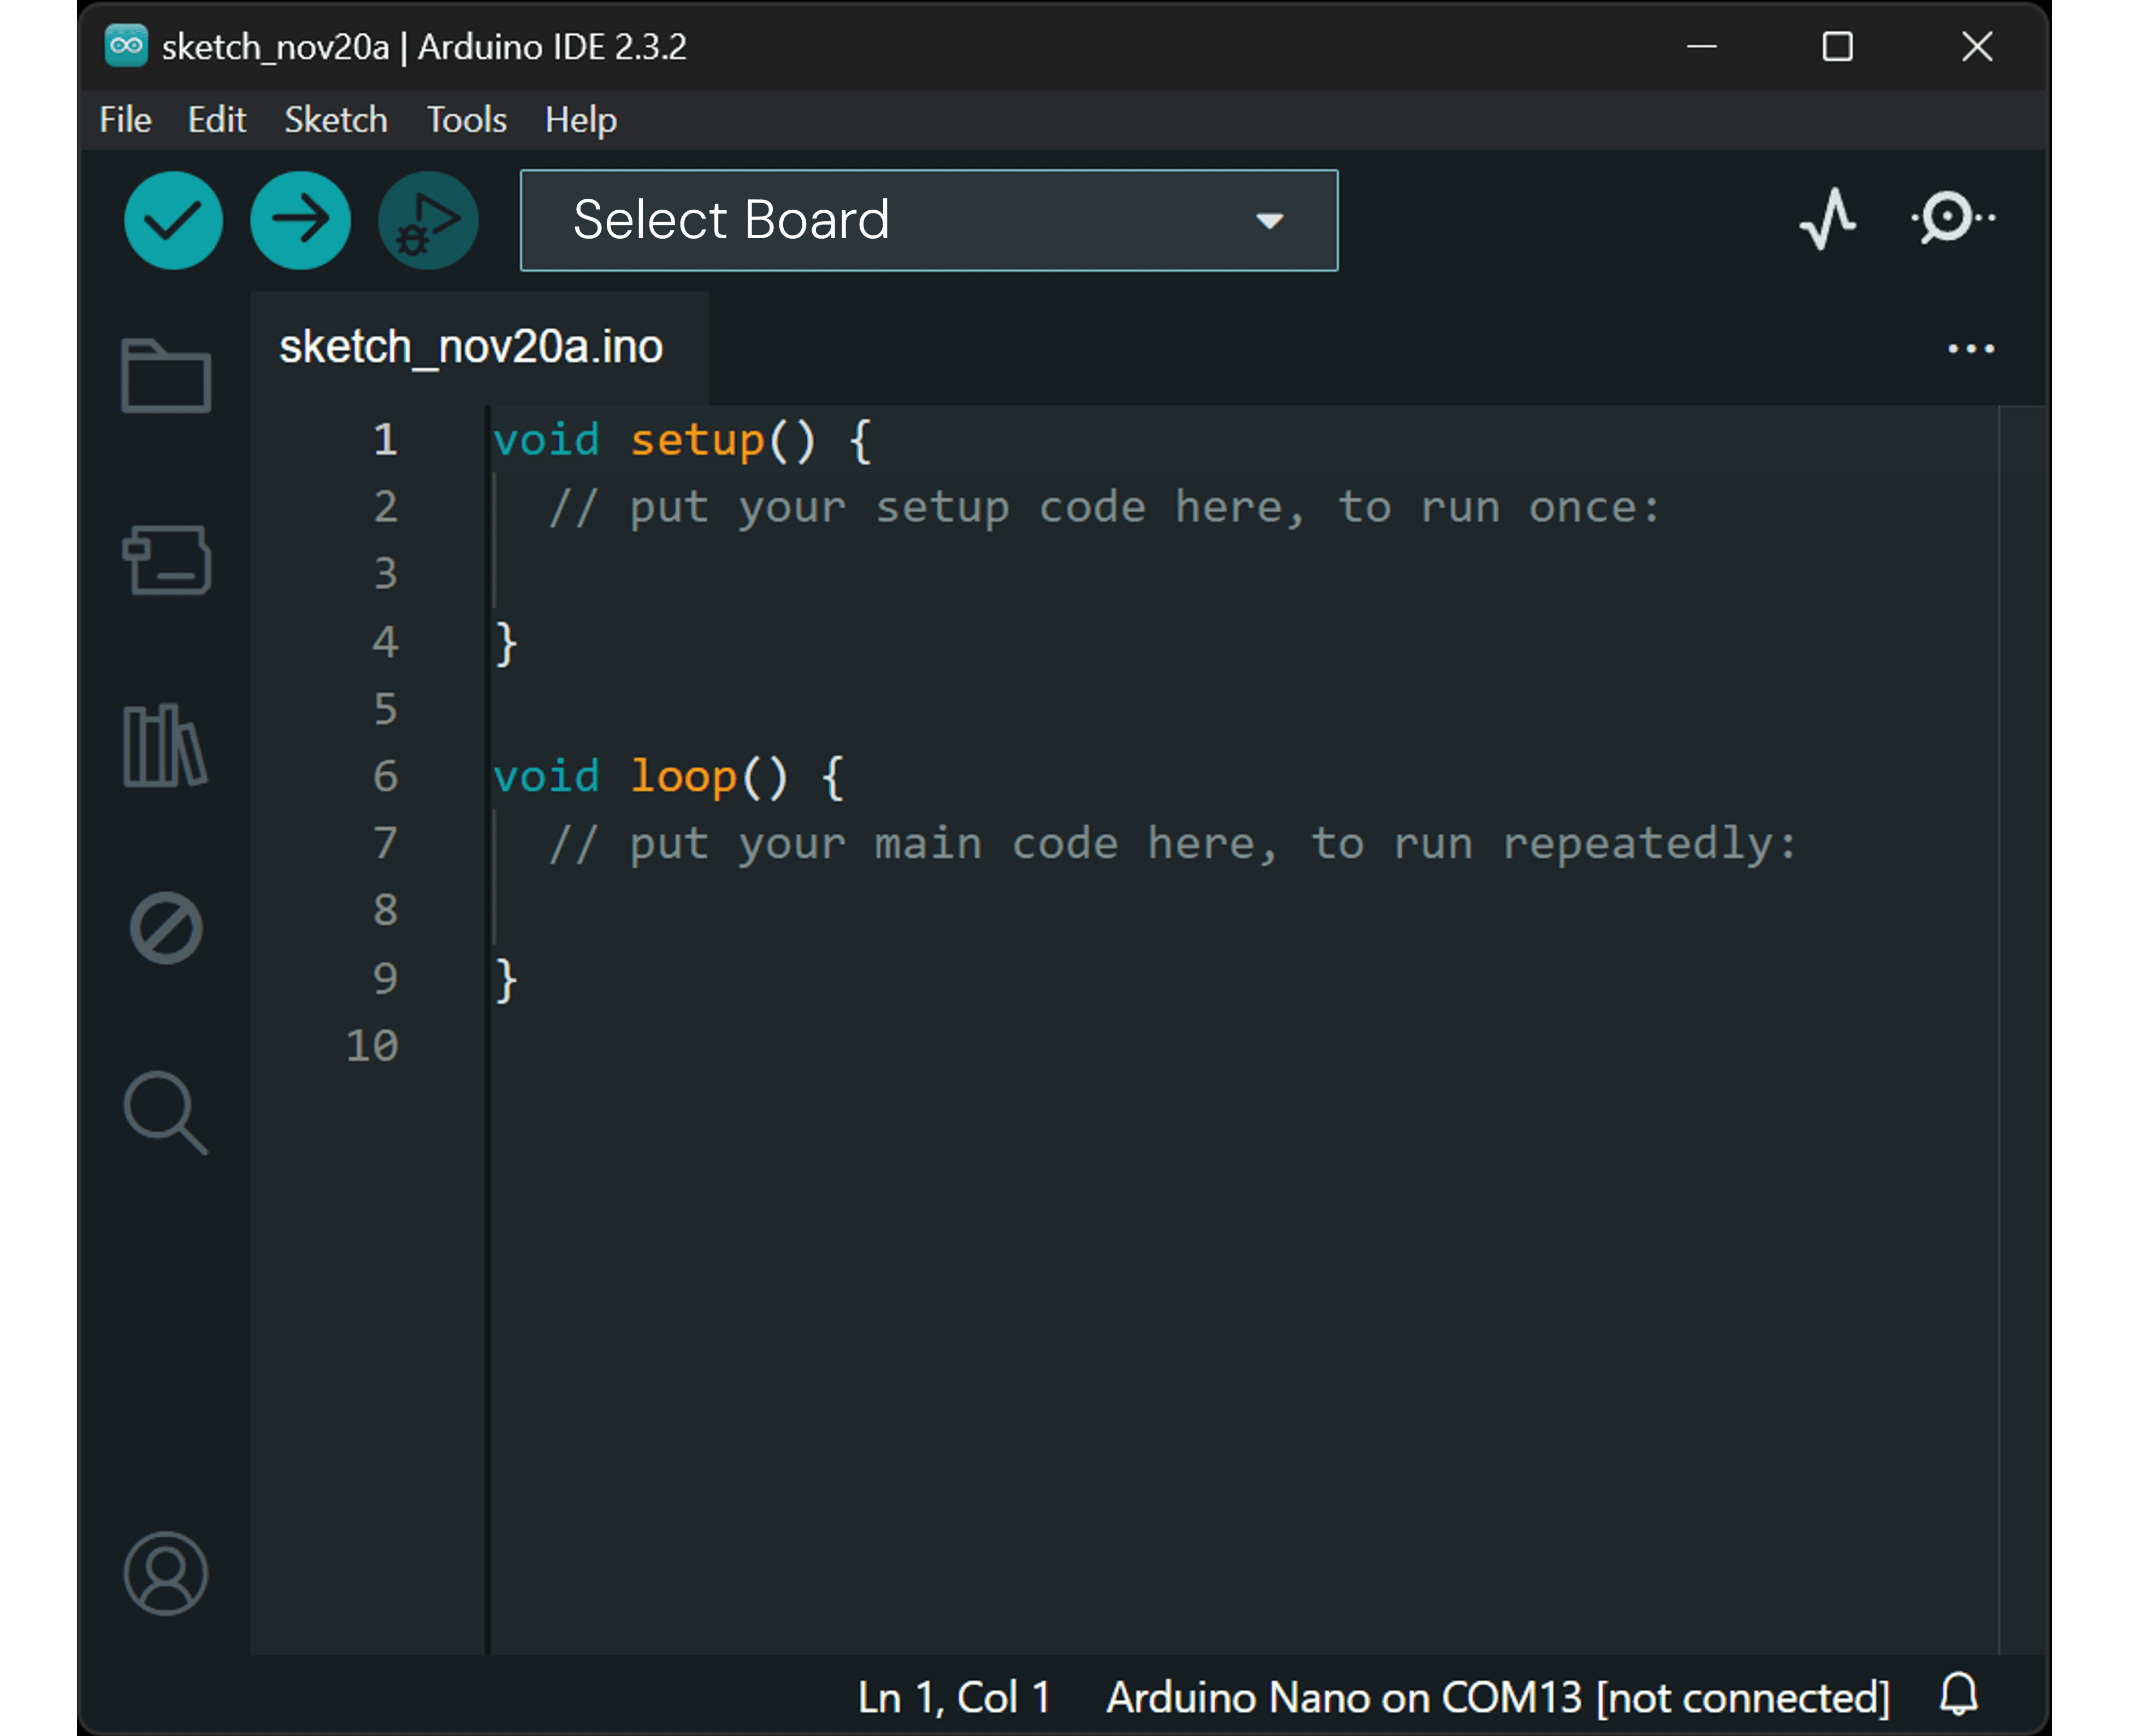
Open Arduino IDE

3
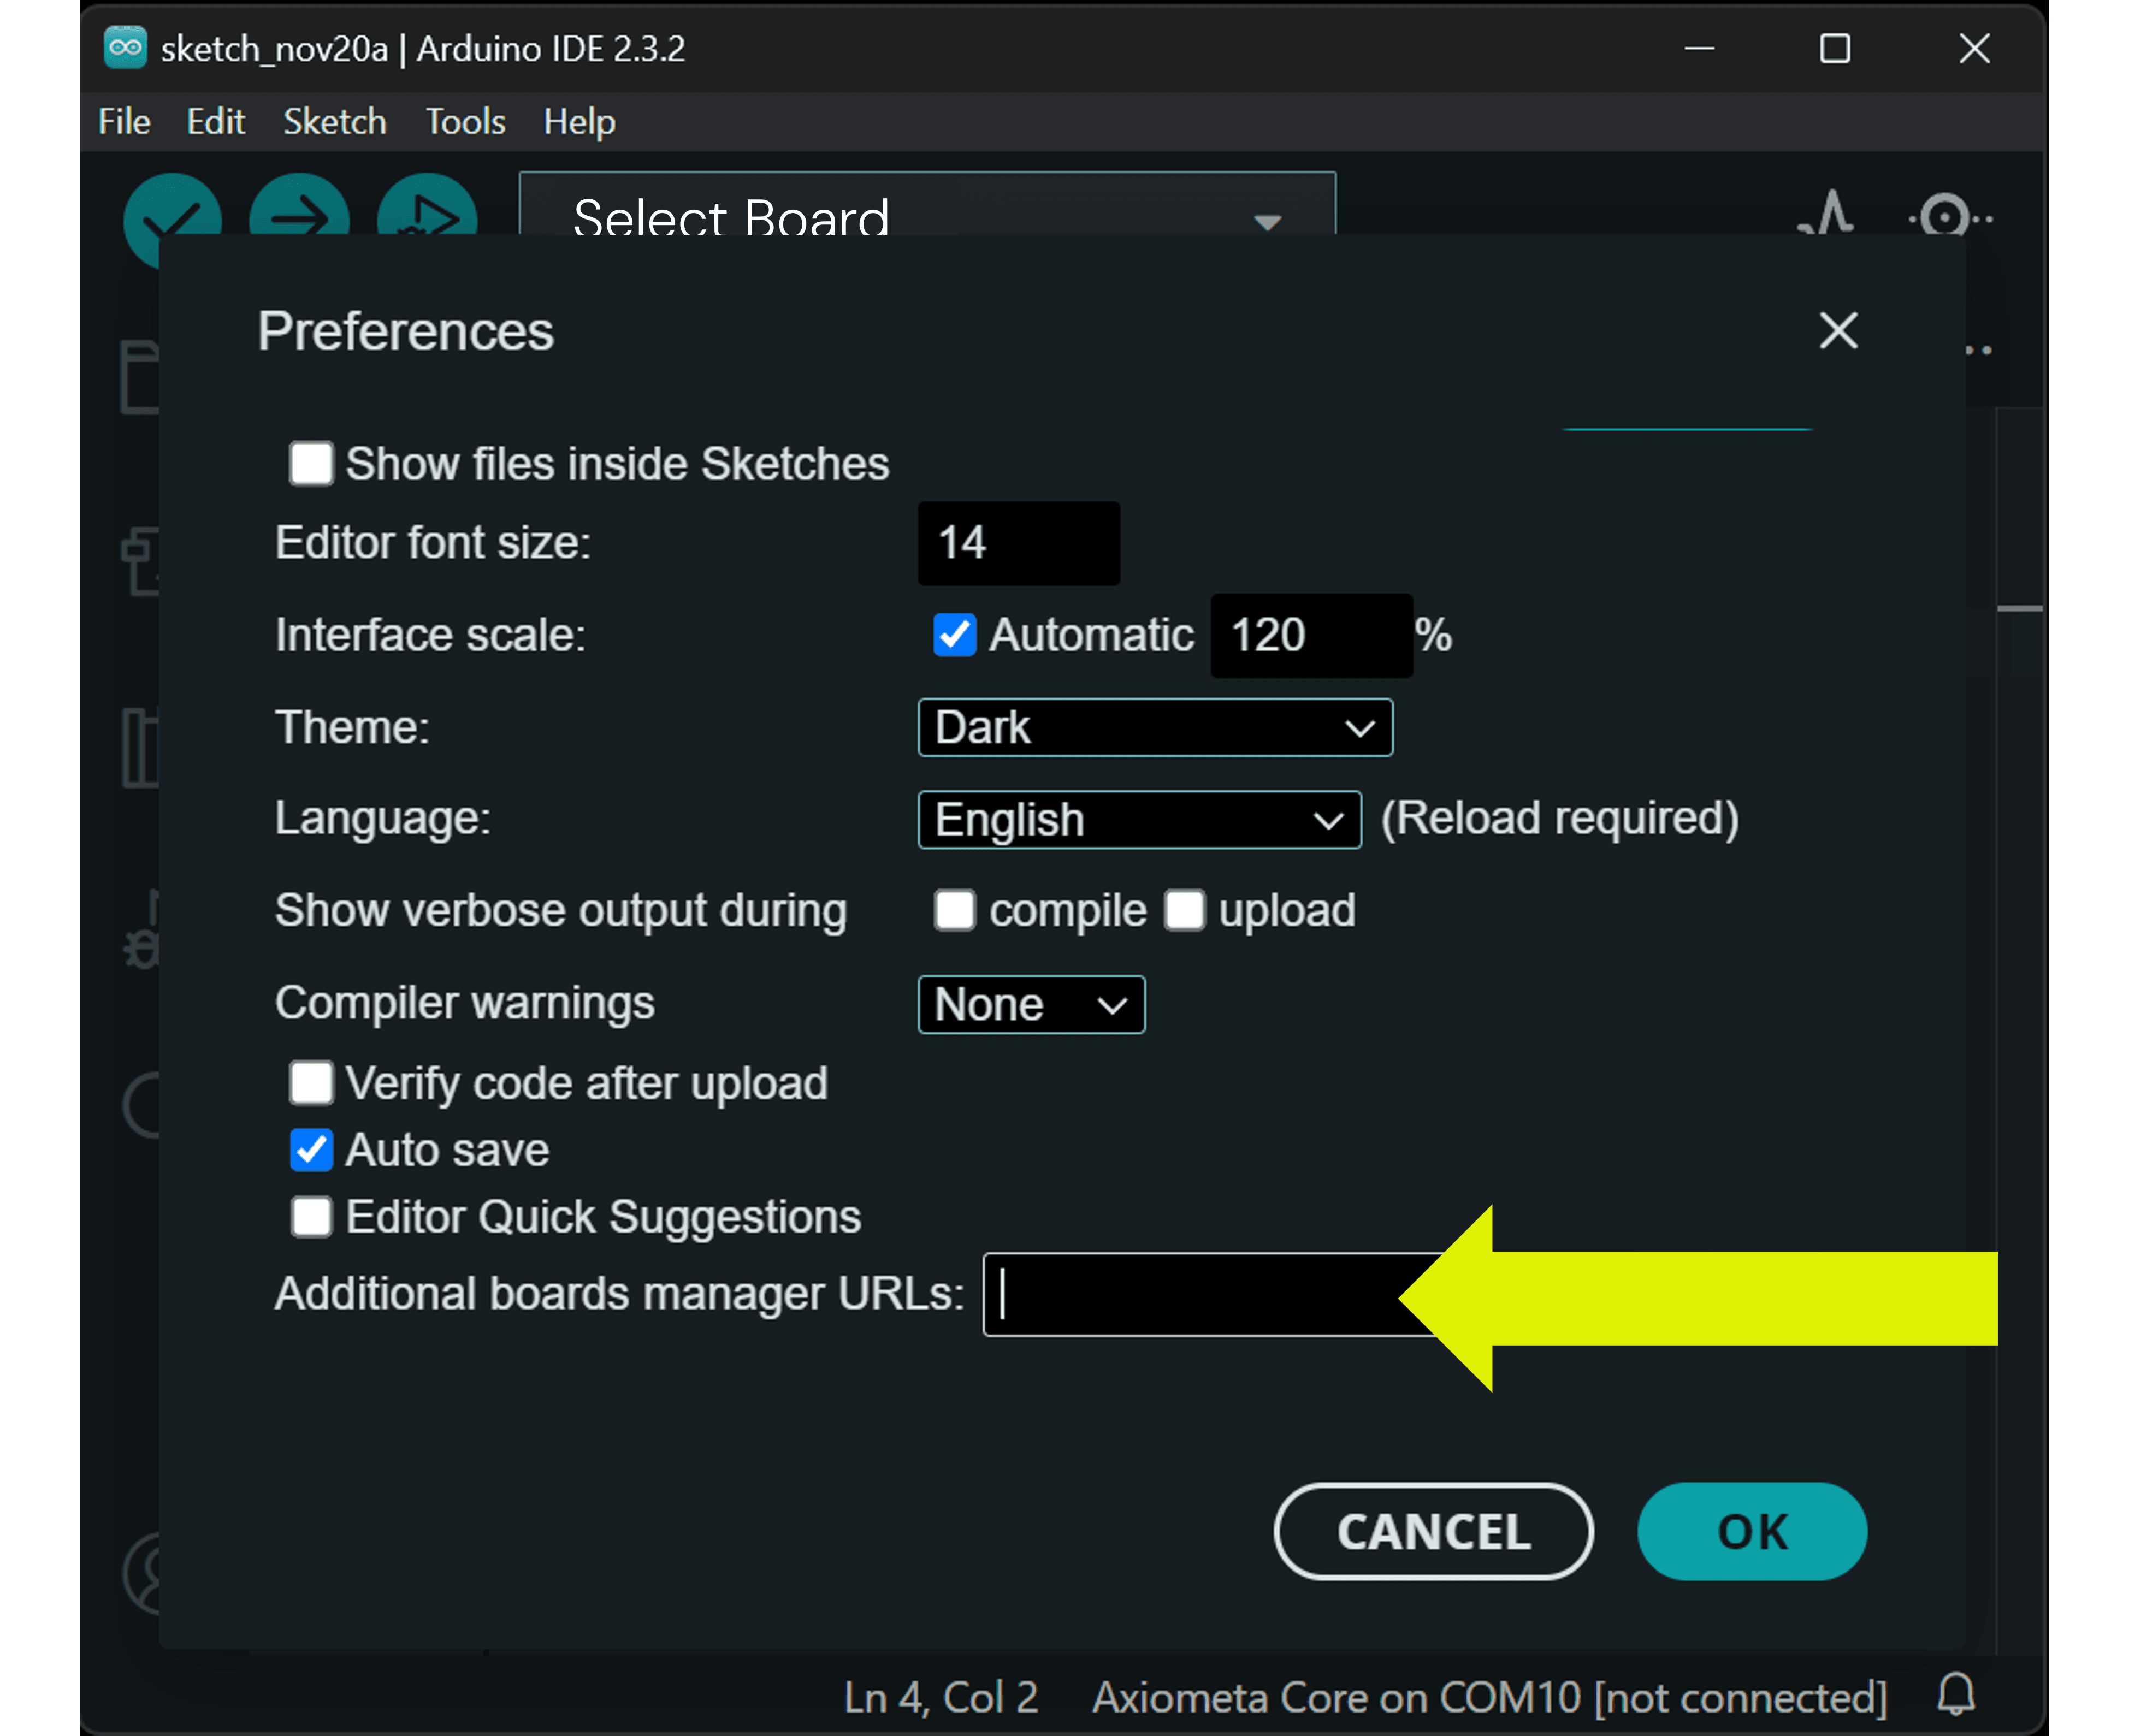
Click File > Preferences
4
Find "Additional boards manager URLs"
5
Copy the link above and paste it, click ok
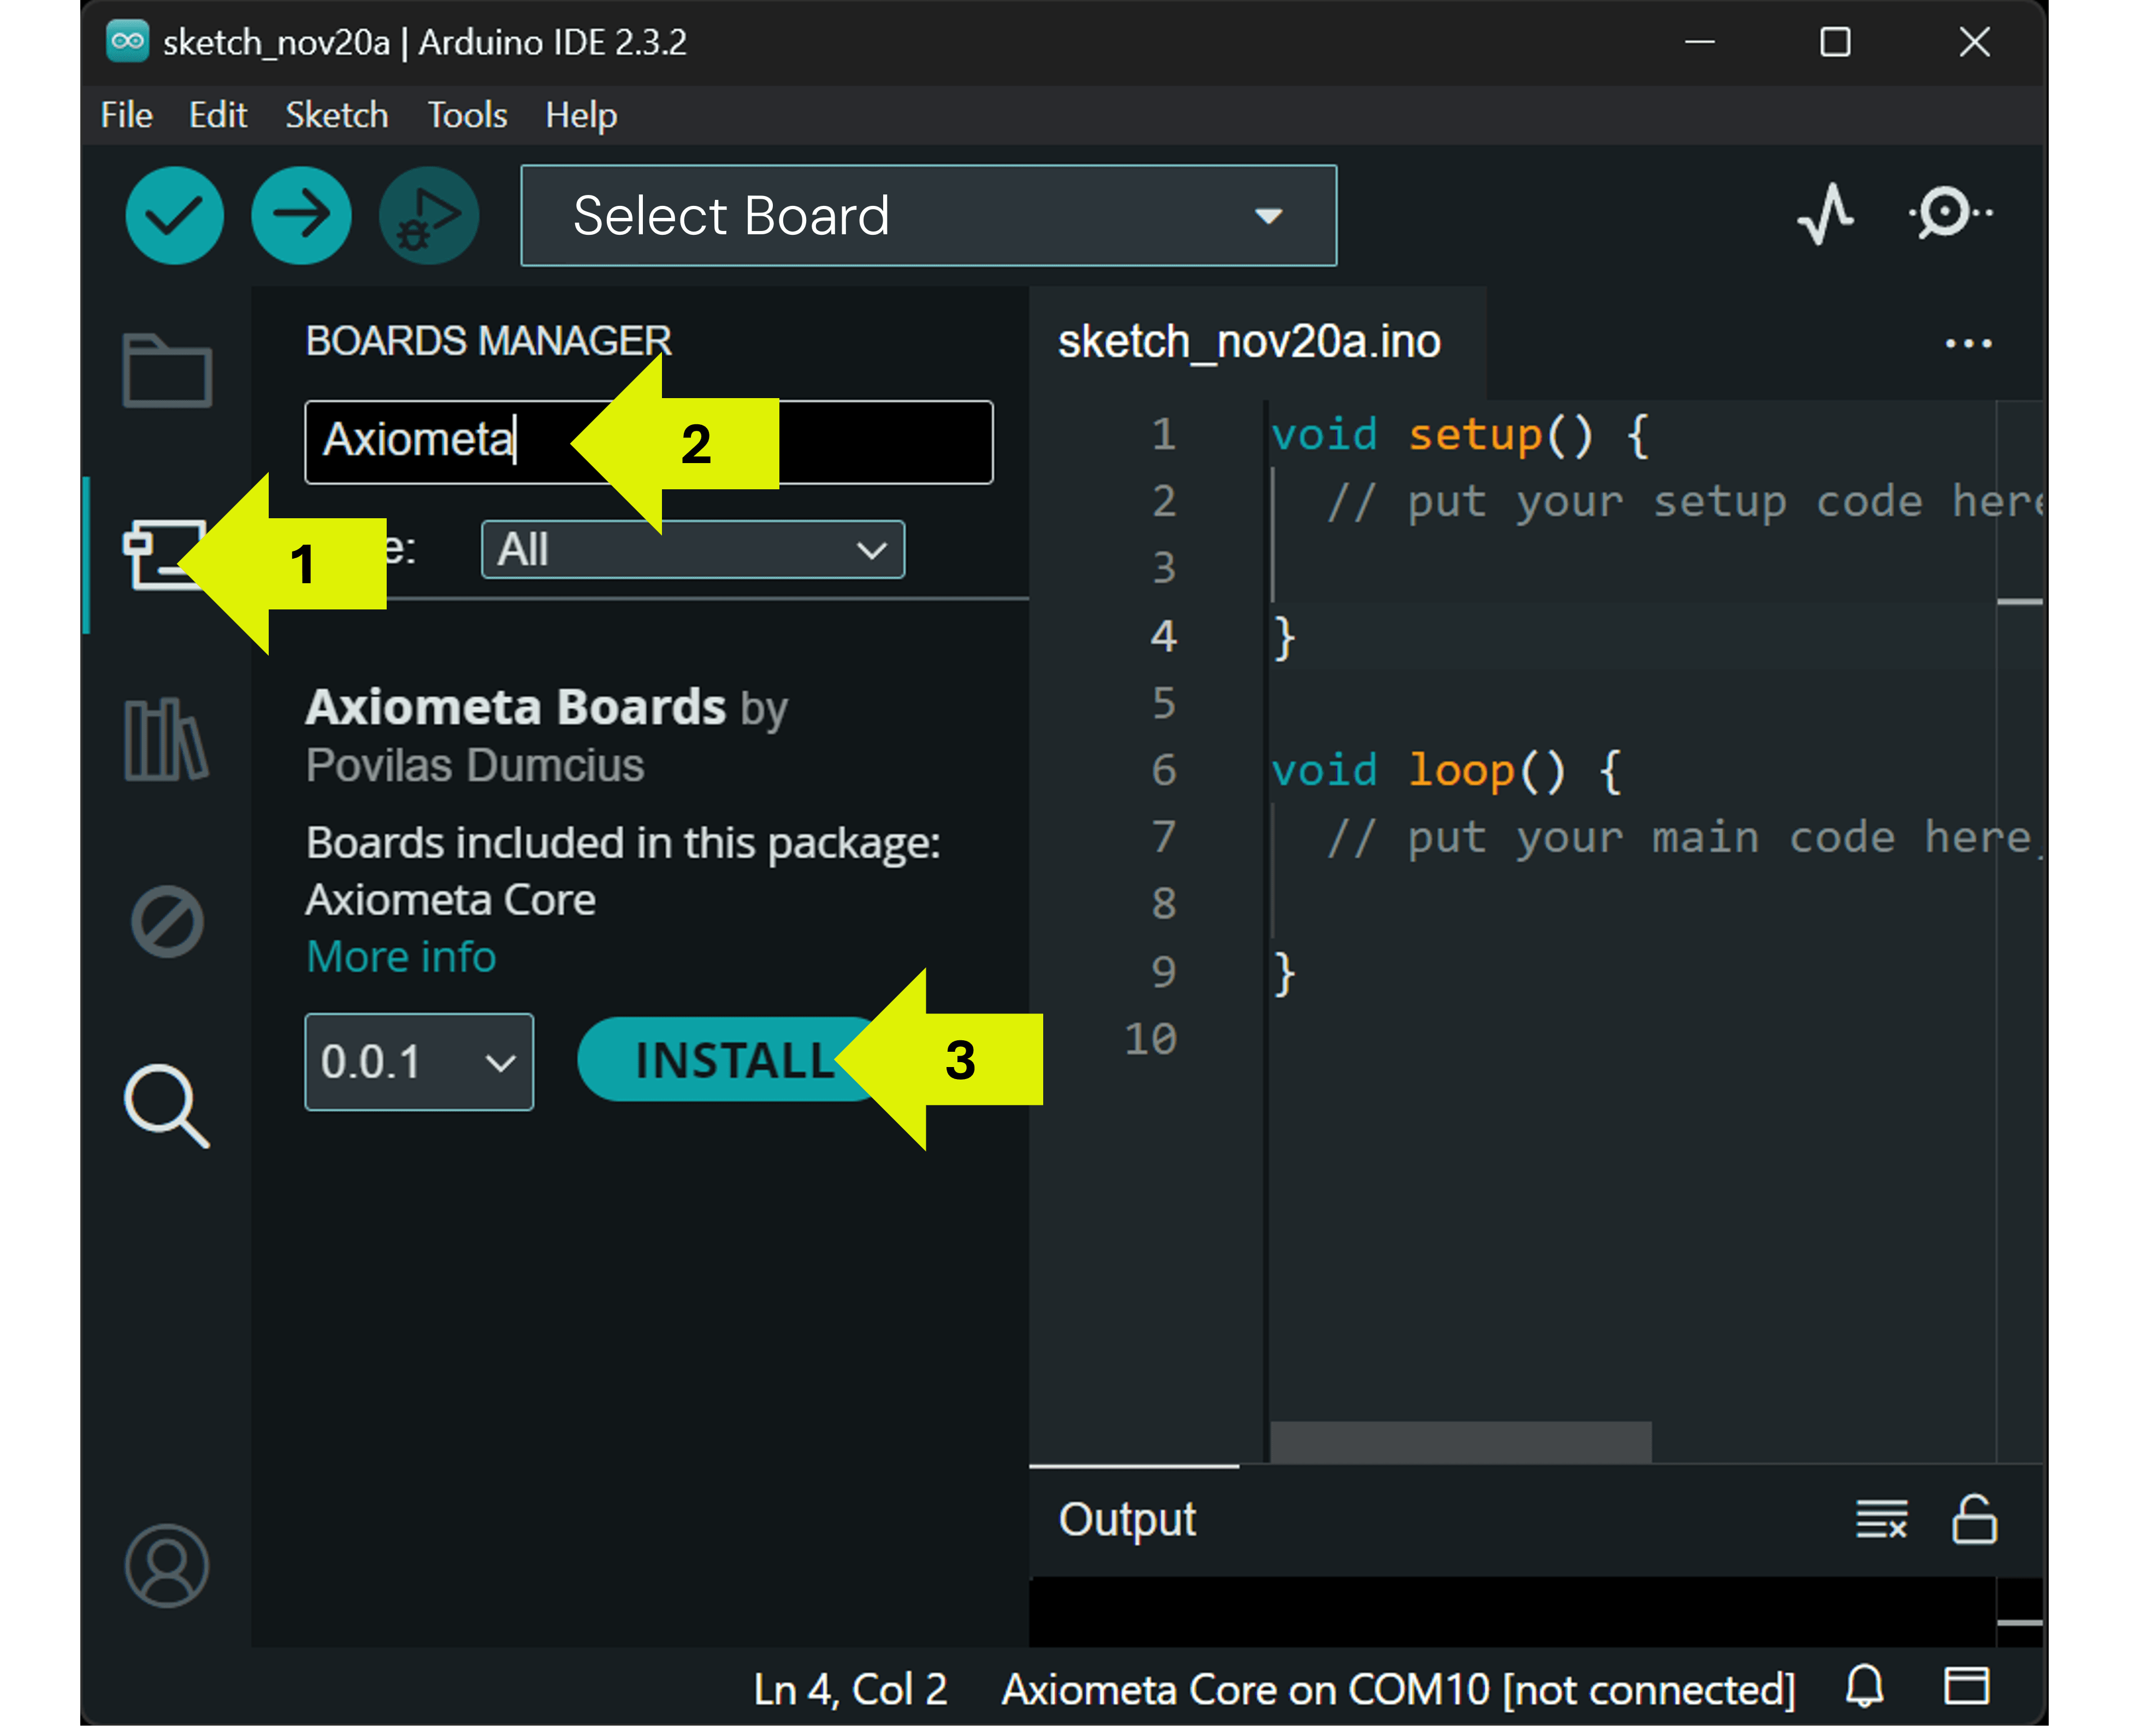
6
Open Boards Manager, search Axiometa and install
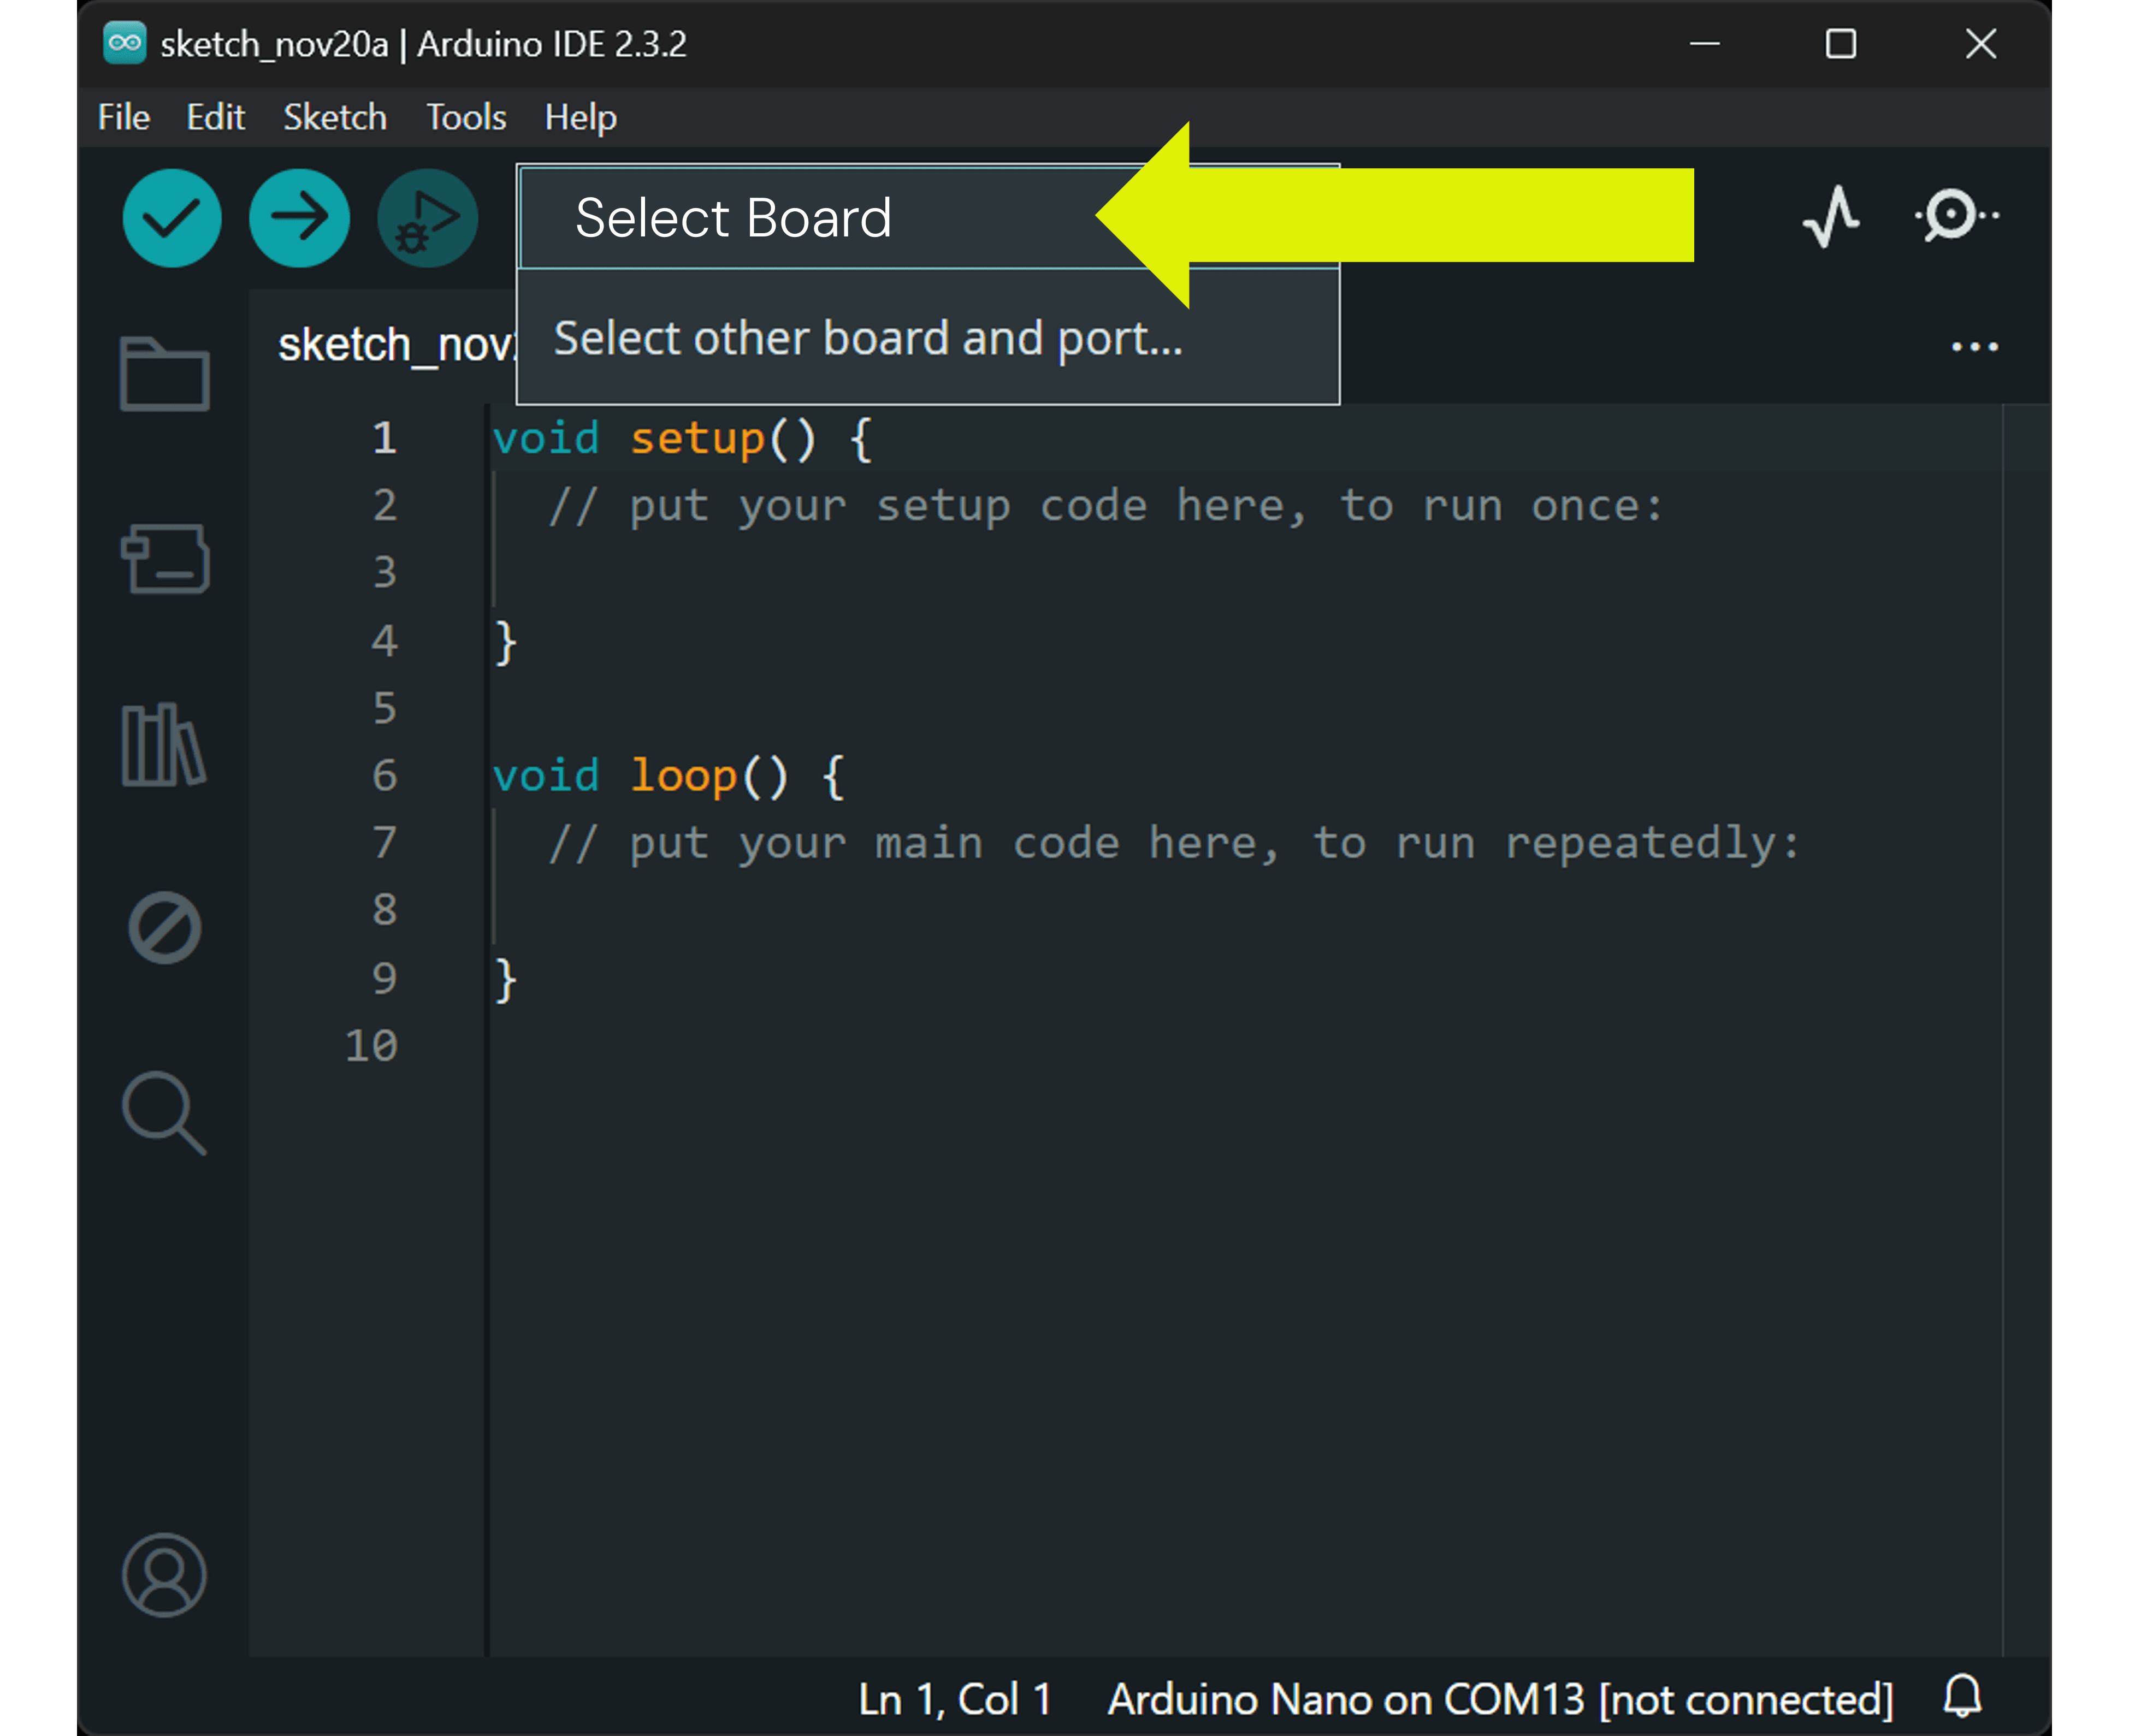
7
Top Left, click "Select Board"
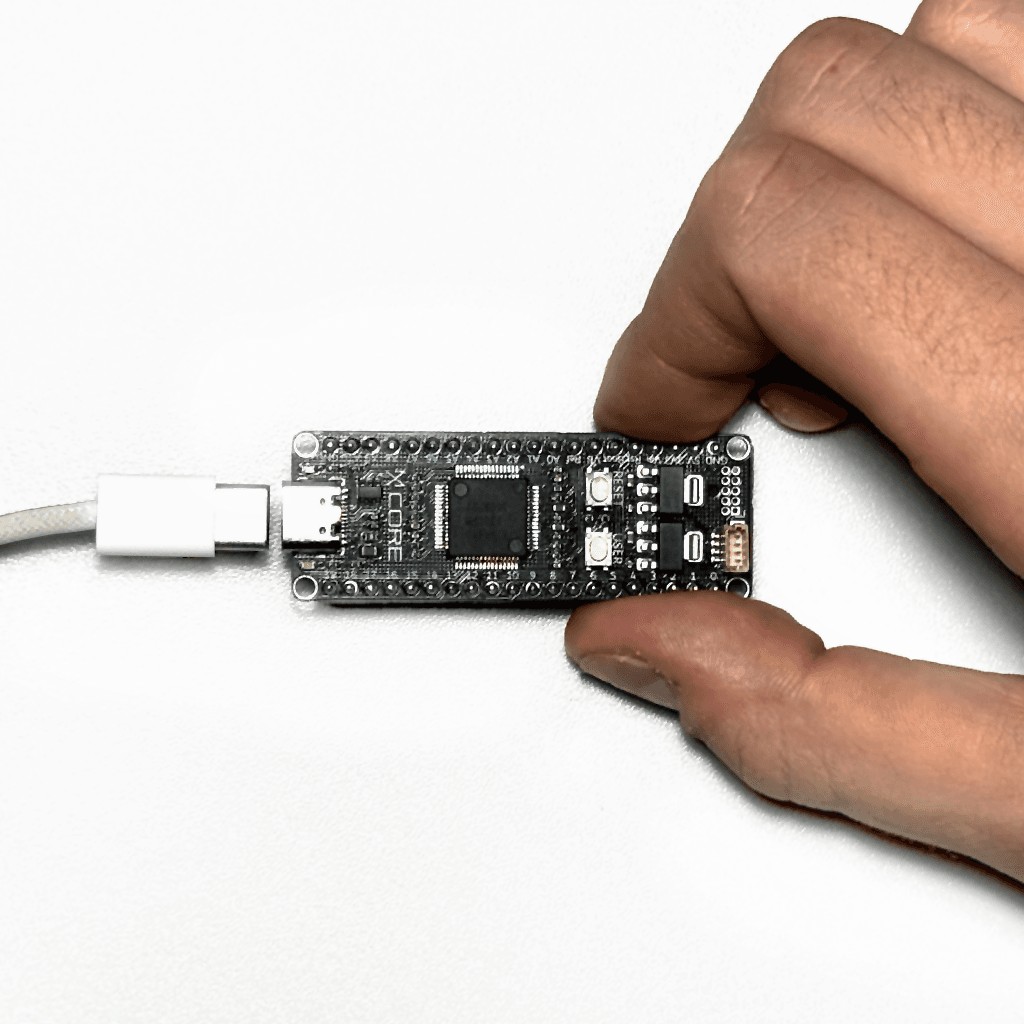
8
Connect Spark 1S to the PC

9
Select the COM port that has appeared
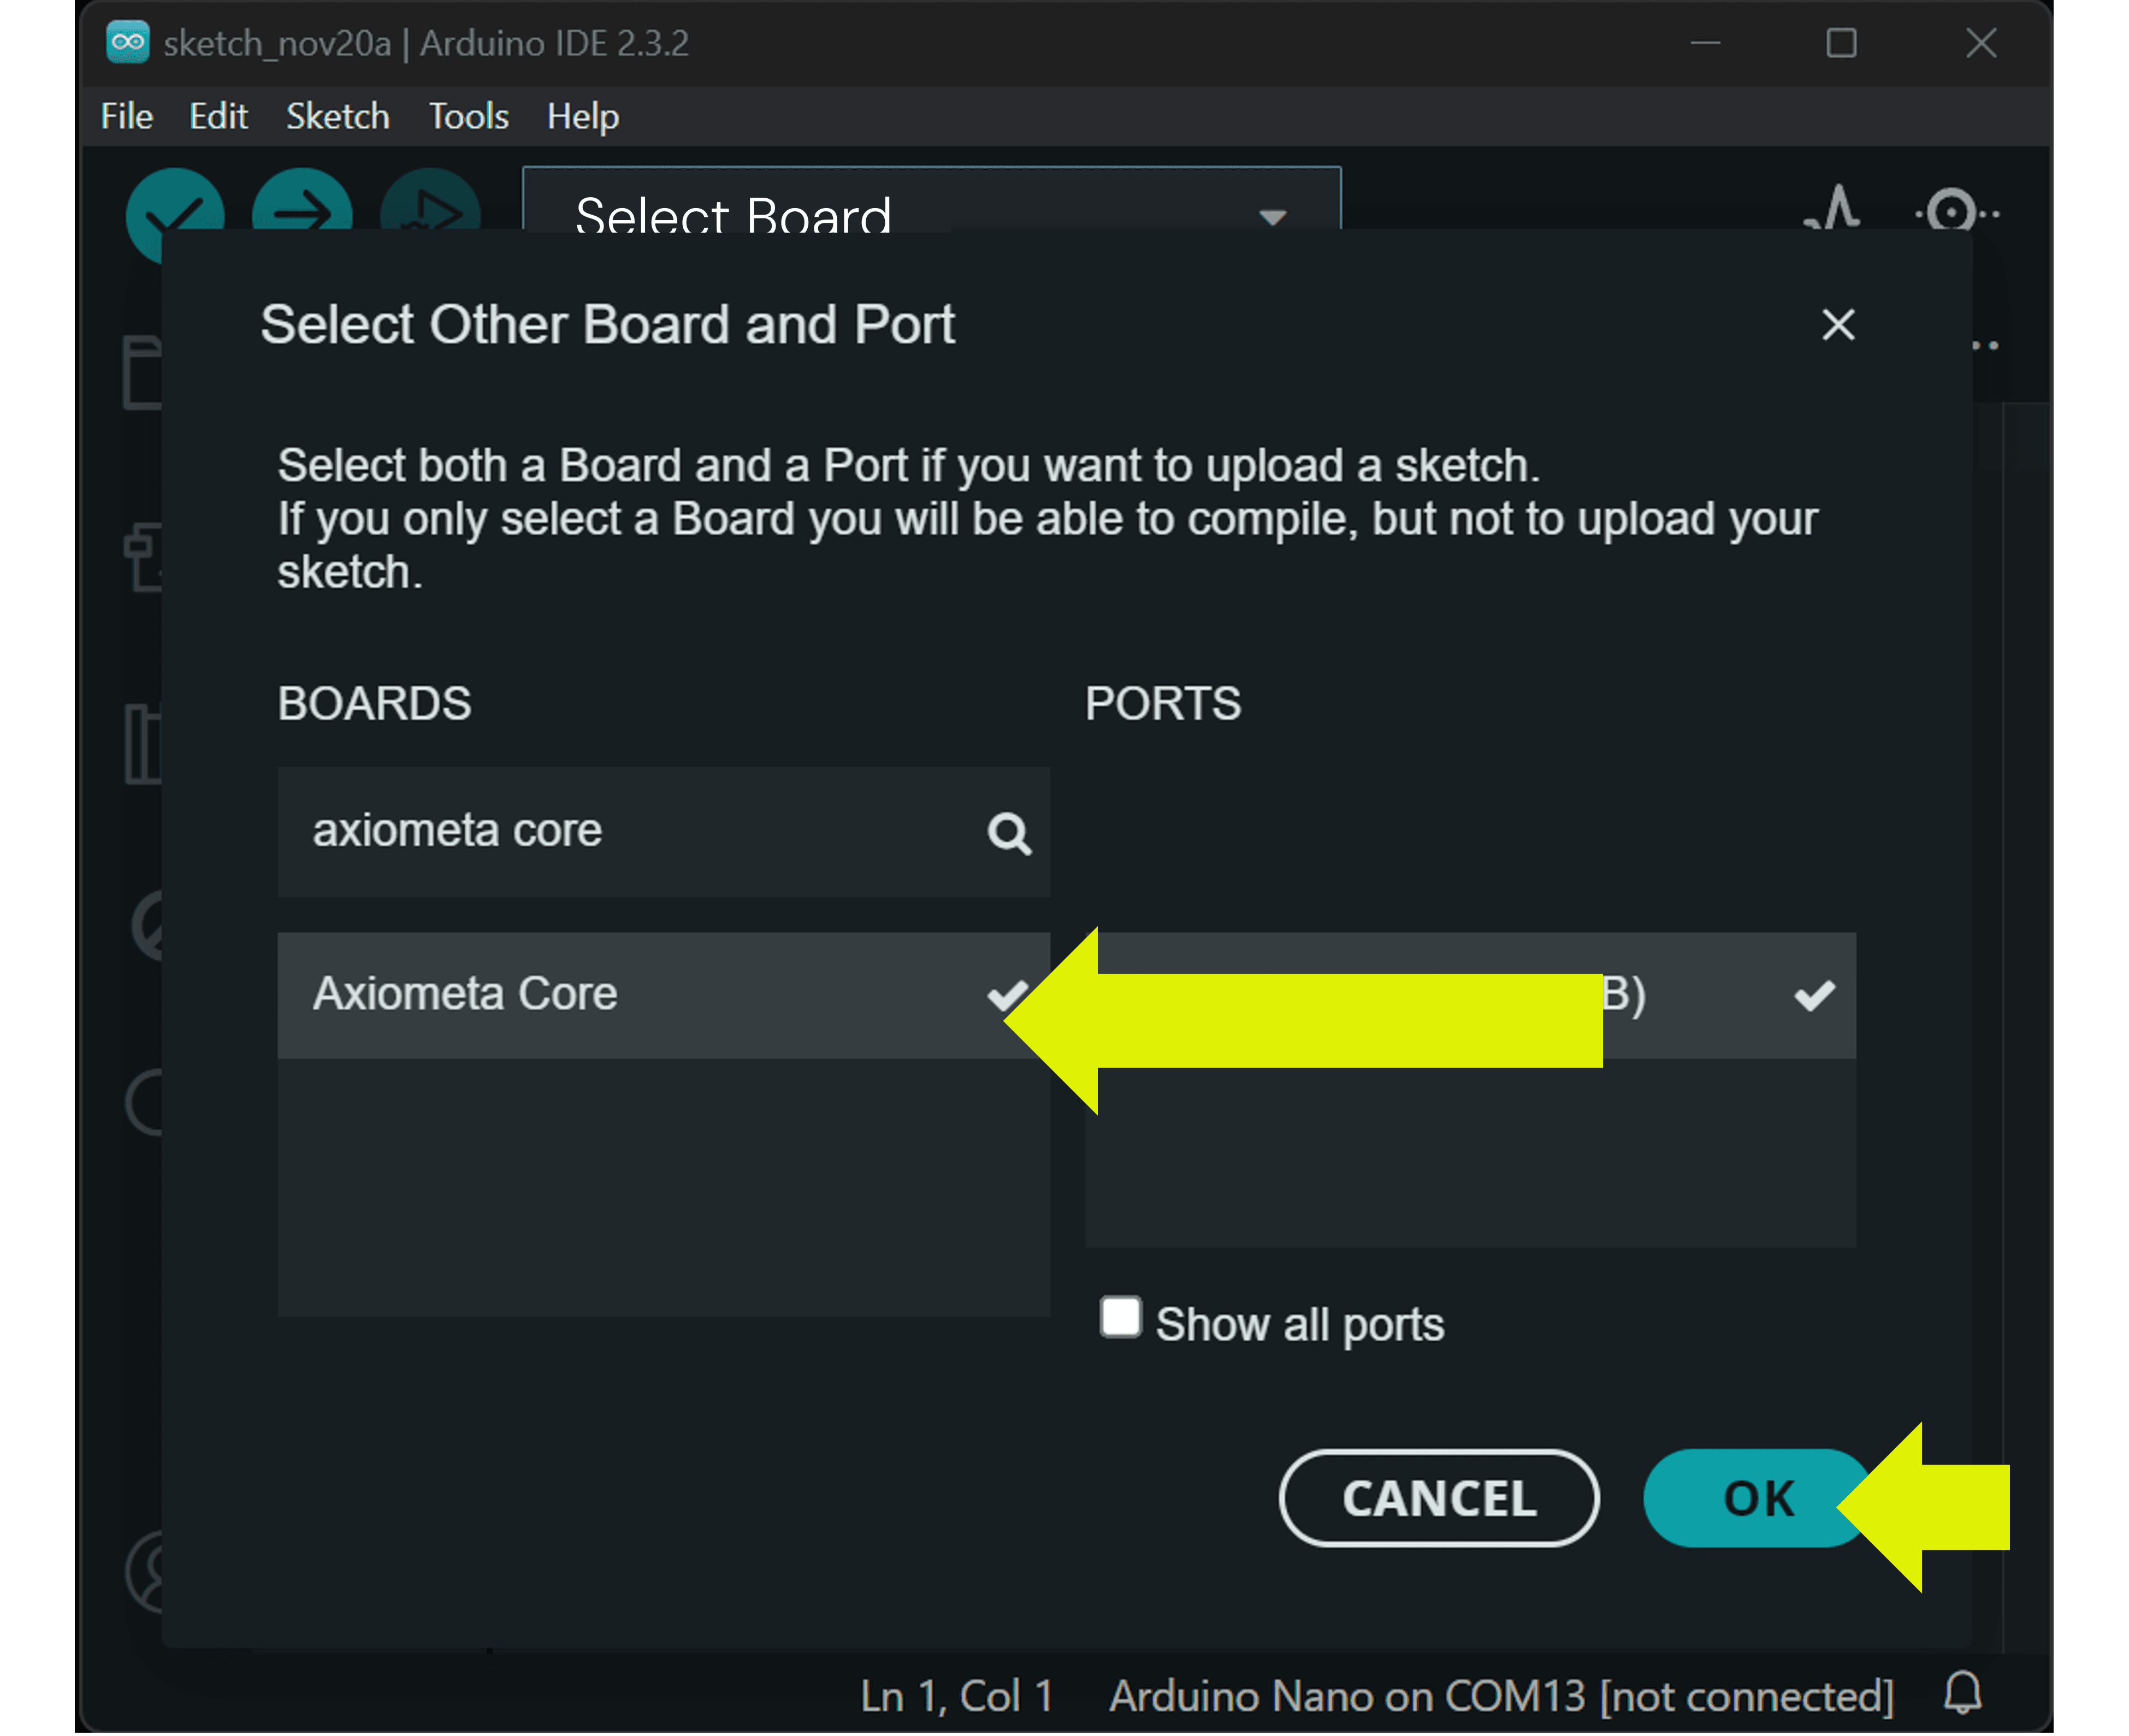
10
Search and Choose Axiometa Core, Click OK

11
Copy and paste a snippet from "Code Examples" Tab
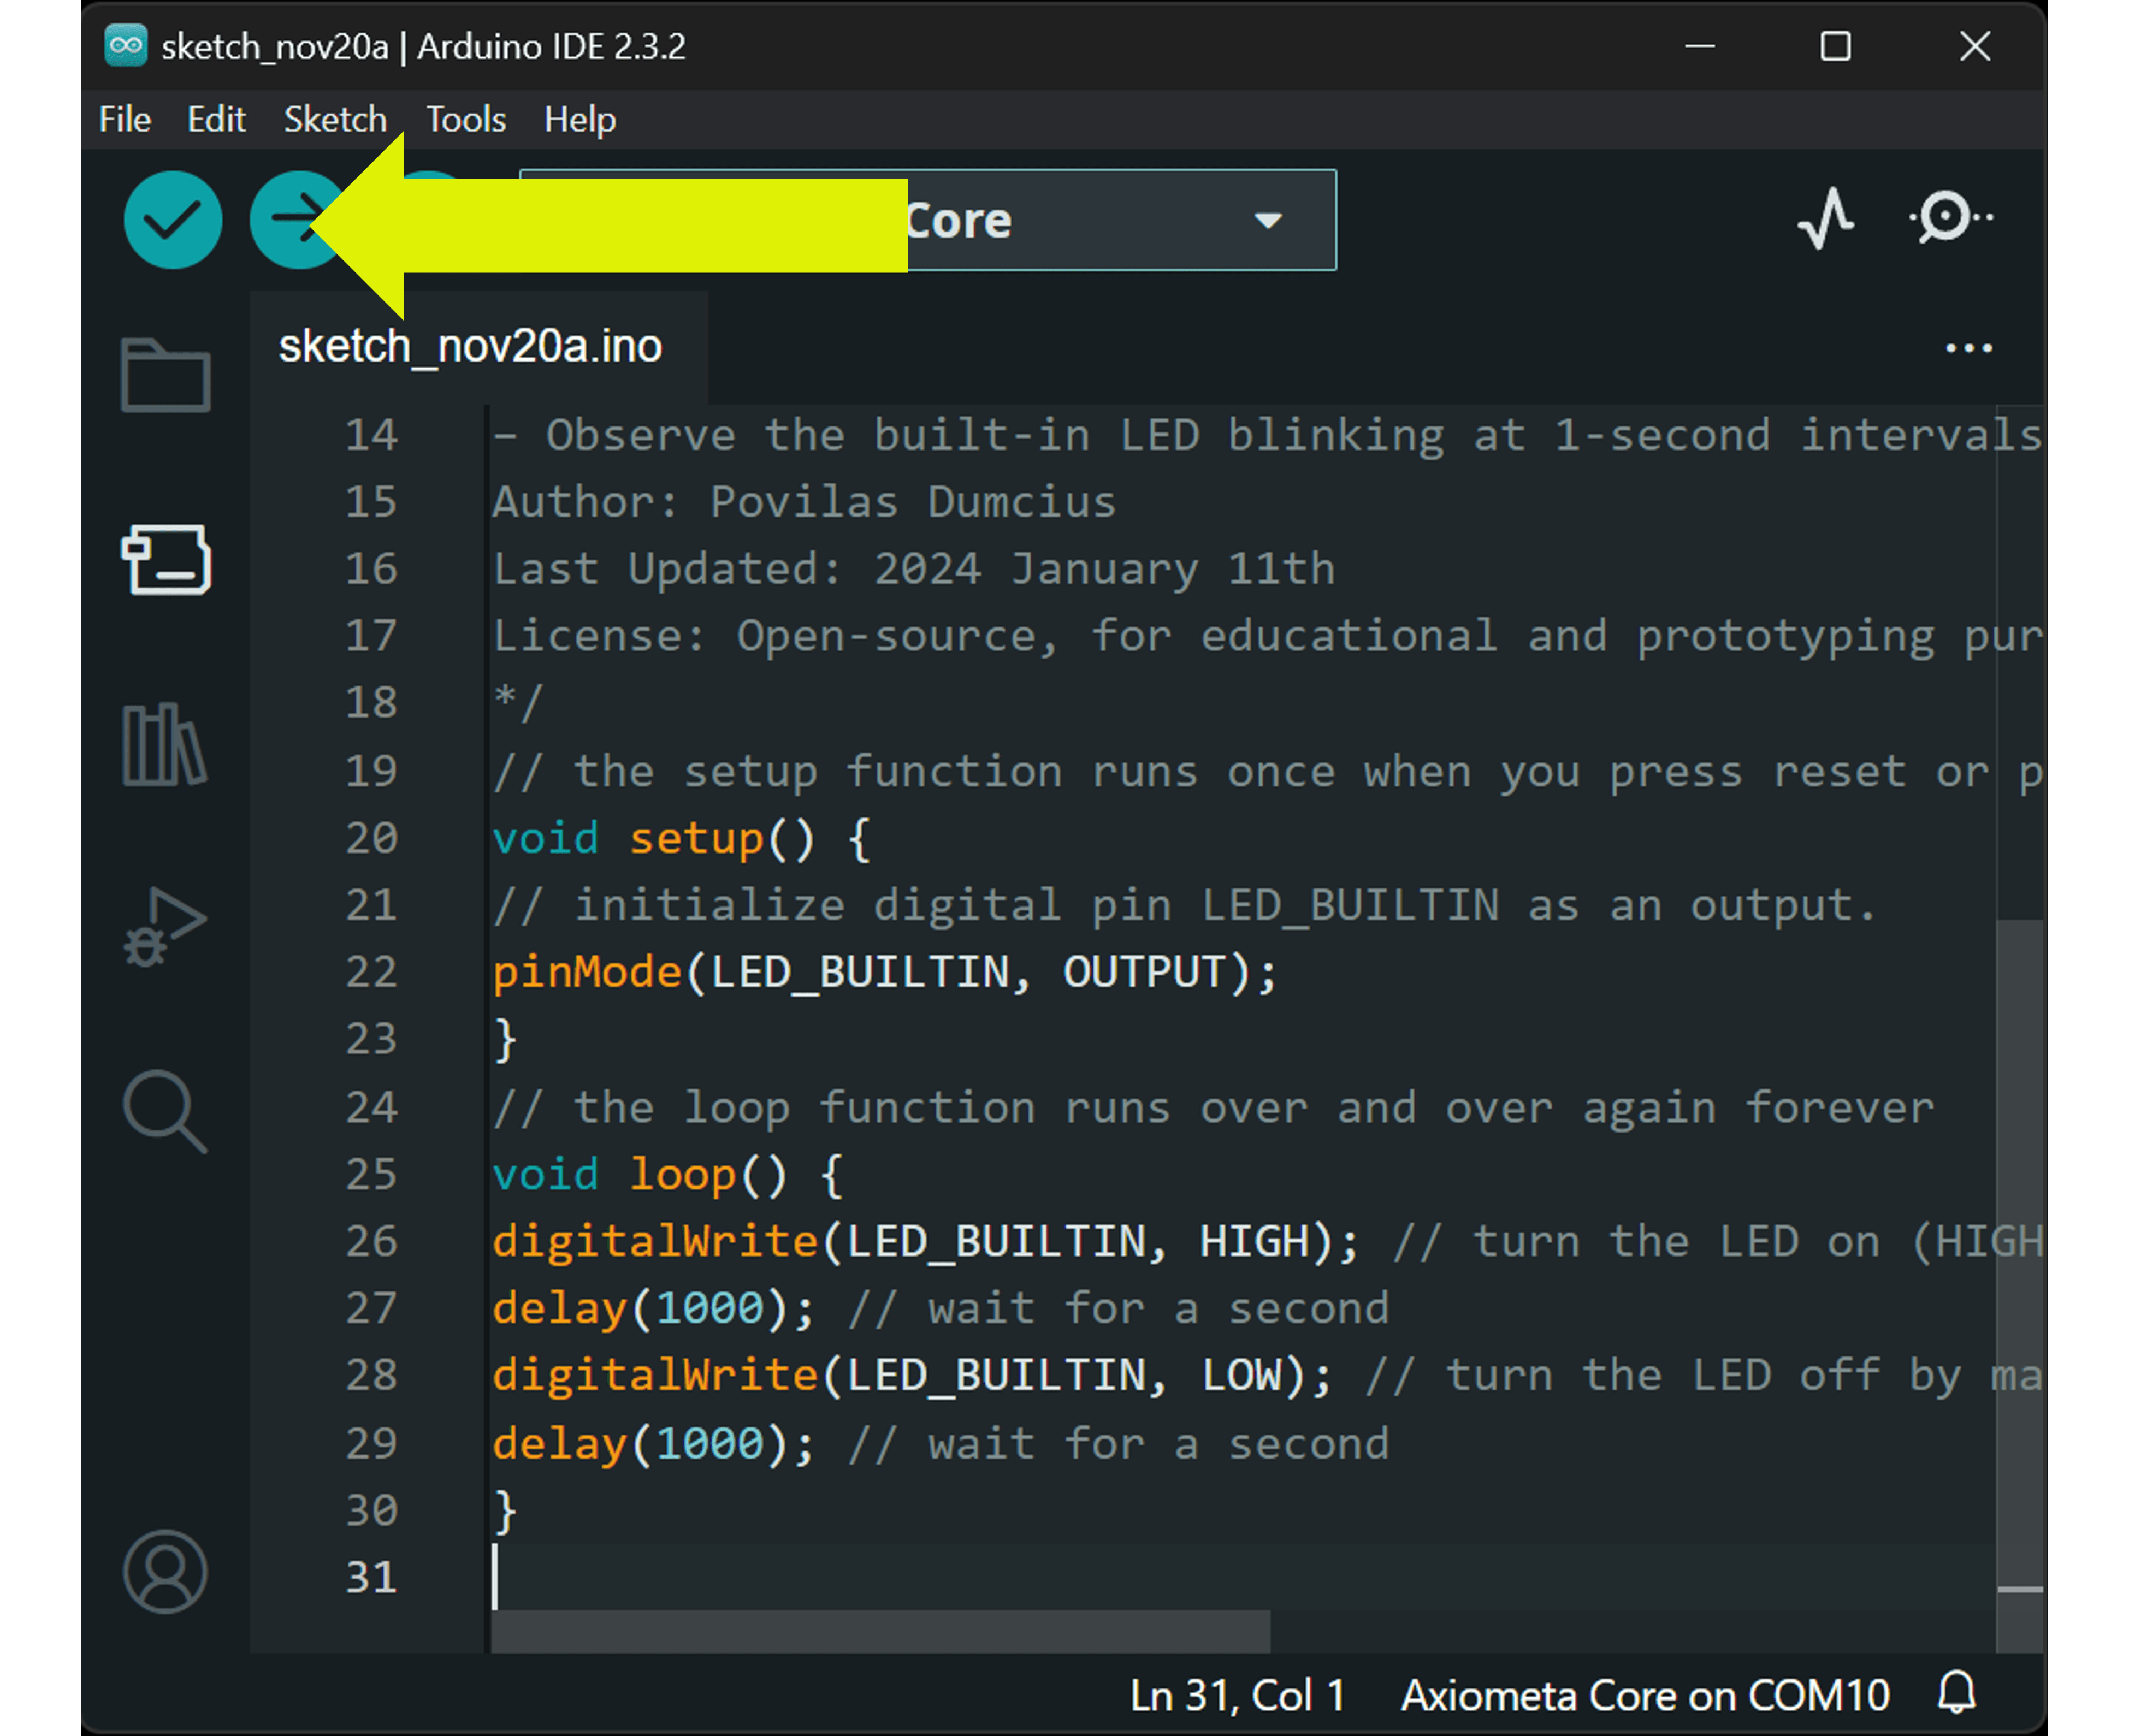
12
Click Upload
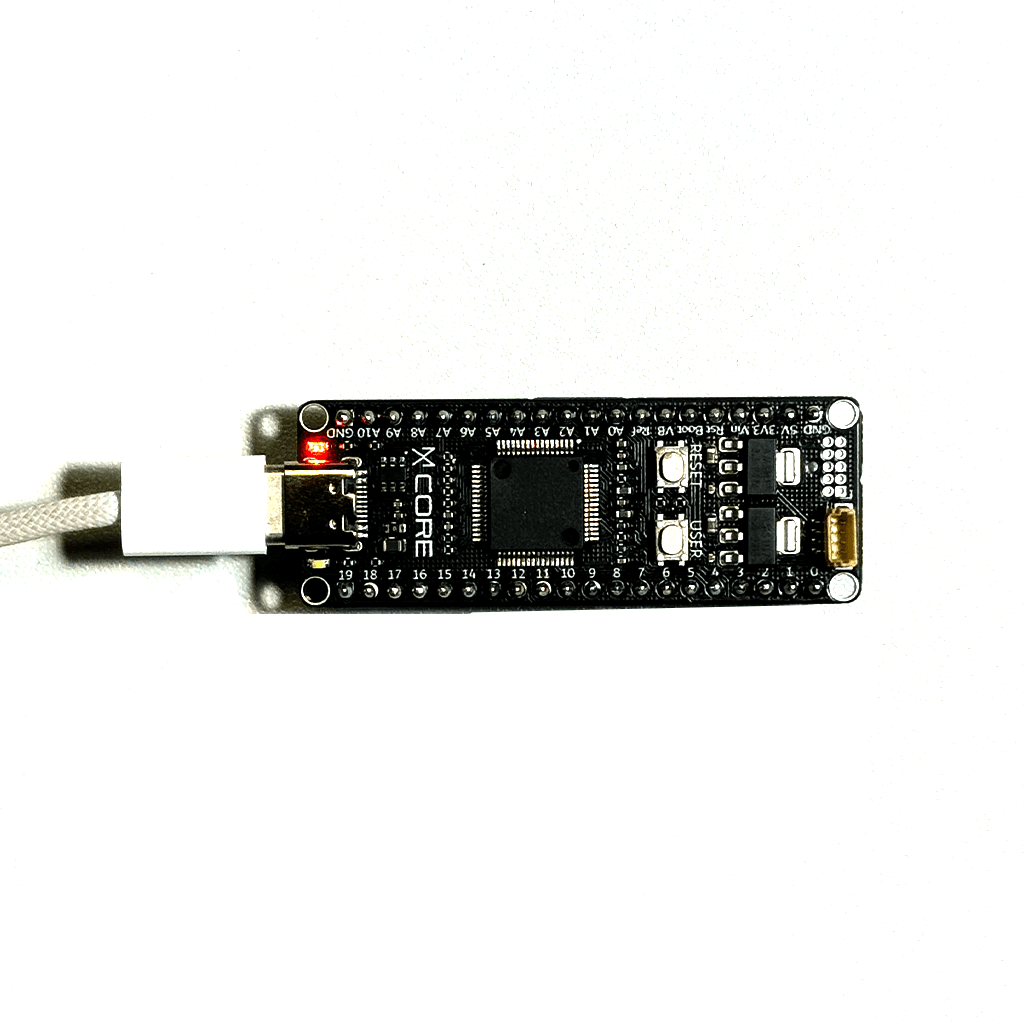
13
Observe the board!
Code Example
Code copied!
/*
Example Code for Axiometa Core 1
===================================
Description: This example demonstrates the basic functionality of the Axiometa Spark 1S microcontroller,
highlighting the control of the built-in LED with a simple blink pattern.
Features:
– Turns the built-in LED on and off in a 1-second interval.
– Serves as an introductory example to familiarize users with the Axiometa Spark 1S.
Pin Configuration:
– LED_BUILTIN (Pin 13): Built-in LED connected to digital pin 13.
Usage:
– Upload the code to the Axiometa Spark 1S using the Arduino IDE or a compatible environment.
– Observe the built-in LED blinking at 1-second intervals.
Author: Povilas Dumcius
Last Updated: 2024 January 11th
License: Open-source, for educational and prototyping purposes.
*/
// the setup function runs once when you press reset or power the board
void setup() {
// initialize digital pin LED_BUILTIN as an output.
pinMode(LED_BUILTIN, OUTPUT);
}
// the loop function runs over and over again forever
void loop() {
digitalWrite(LED_BUILTIN, HIGH); // turn the LED on (HIGH is the voltage level)
delay(1000); // wait for a second
digitalWrite(LED_BUILTIN, LOW); // turn the LED off by making the voltage LOW
delay(1000); // wait for a second
}
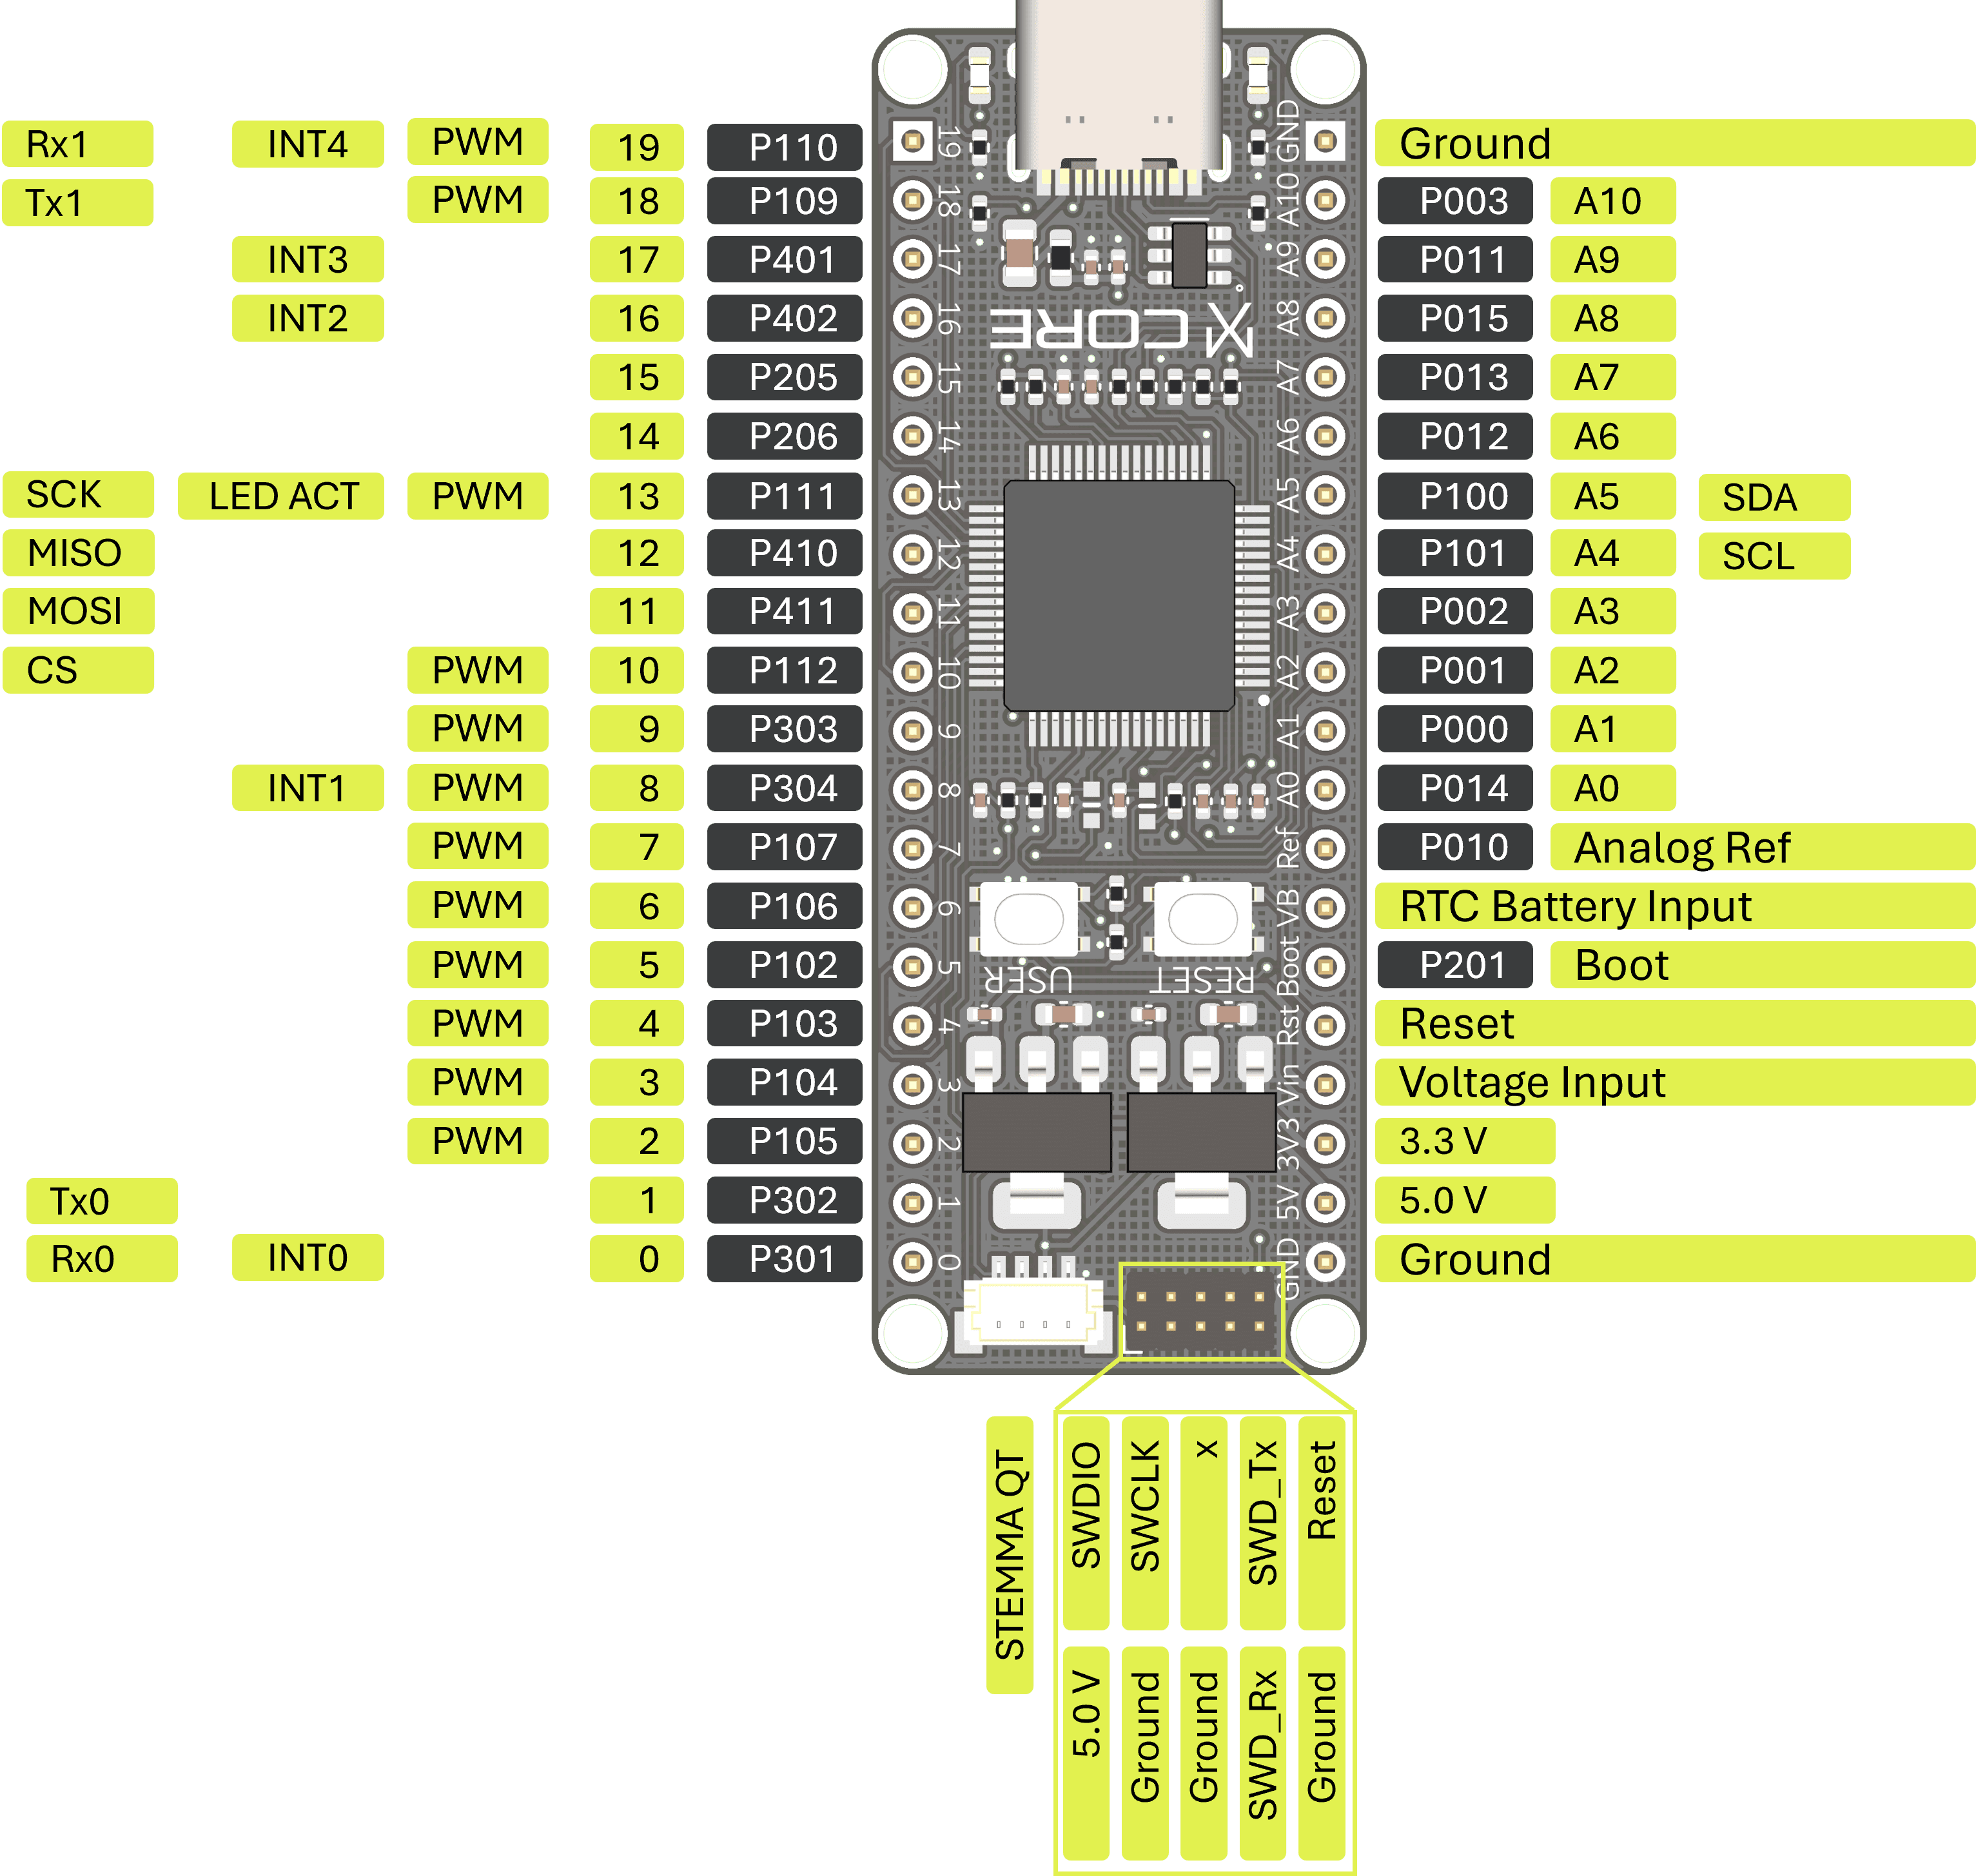
Pinout Map
Schematics, 3D Models
User Guide
Schematics, 3D Model
User Guide
Start Connecting
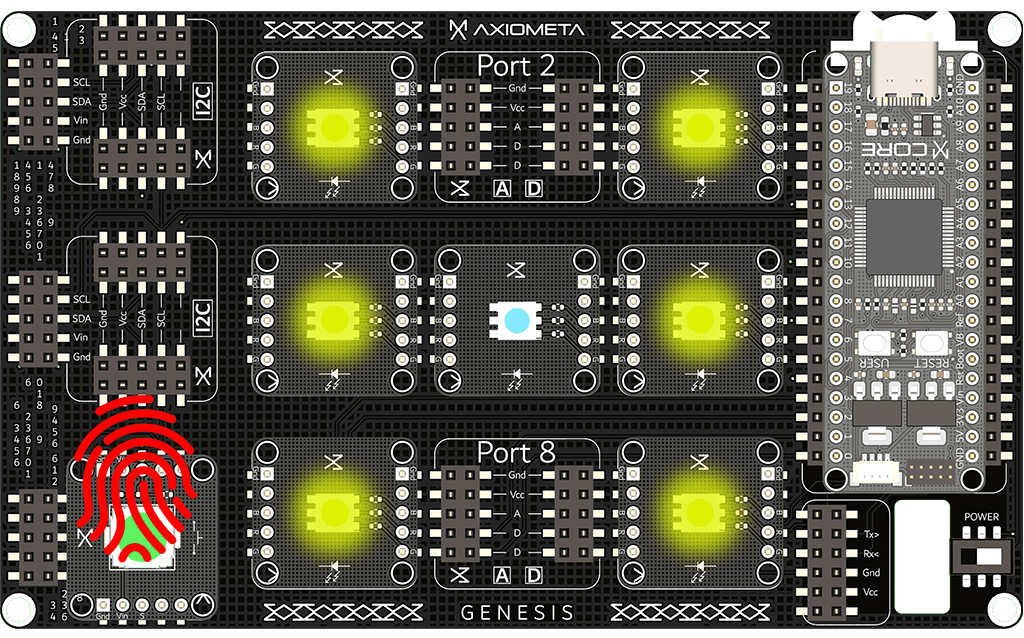
Now that you’re familiar with the board, explore the peripherals section for instructions and code examples.
Schematics, 3D Model
